This is meant to be a step by step guide to making great tasting homemade pizza. A few edits here and there, and it can be adopted to making your own bread, making your own pasta sauce, or any number of different recipes.
This guide is long, but it's meant to make this mistake-proof for people who don't have a lot of cooking experience.
Step 1: The Pizza Dough.
The recipe was adopted from here: http://allrecipes.com/recipe/pizza-dough-iii/ However, I've modified it a bit. The ingredients call for:
1 (.25 ounce) package active dry yeast
1 cup warm water (110 degrees F/45 degrees C)
2 cups bread flour
2 tablespoons olive oil
1 teaspoon salt
2 teaspoons white sugar
However, I discovered that this makes for not a lot of dough for a pizza, and it's hard to roll out. This would be fine for a simple white bread recipe, but if I'm going to bake, I like to have left overs. So, I'm going to triple this recipe. I'm also going to rearrange this list, to add the ingredients in order. So it becomes:
3 cups warm water (use hot tap water)
6 teaspoons white sugar
1 package active dry yeast
6 cups all purpose flour, plus extra as needed
3 teaspoons salt
olive oil as needed, about 1 tablespoon.
Cooking Tip #1. 3 teaspoons = 1 tablespoon. Therefore our sugar becomes 2 tablespoons, and our salt becomes 1 tablespoon.
So now we have the ingredient list, now let's begin.
Hot Water.
Cooking Tip #2. There is a difference between wet and dry measuring cups. One thing can't be used for the other. We begin with 3 cups hot tap water using a wet measuring cup.

Now we add 2 tablespoons of white sugar.

Now we stir this around with a spoon.

We want to dissolve all the sugar into the water, so we no longer see any sugar granules left.

Yeast
Transfer hot water to a mixing bowl.

Now it's time for the yeast.

Do NOT just dump the yeast in the water. Instead we want to sprinkle the yeast on top of the water, avoiding making little yeast clumps.

When we finish adding the entire package, it should look like this.

Now we wait about 5 minutes for our yeasties to get foamy. When they do, they will look like this.

Next, it's time to do a smell test. Does the bowl smell like fresh bread? It should.
Yeast trivia: Yeast is a kind of tiny fungus. They live very short lives. In the time it took for our yeast to get foamy, they have reproduced a few million times.
Yeast do a few different biological things. 1) Like us, they breathe in oxygen, and breathe out carbon dioxide (CO2). 2) They eat sugar. 3) They also poop. Except their poop is ethanol. In other words, their poop makes humans drunk. Yeast is used to make alcoholic beverages, we use the poop, and discard the CO2. In bread, the alcohol is cooked off and evaporates, but what they breathe out (CO2) is used to let dough rise. Without this, bread would be more like crackers than bread.
Measuring The Dry Ingredients
While we wait for our yeast to get foamy, let's measure out the dry ingredients. Now since it's dry, we need to use a dry measuring cup.

We will be using all purpose flour.

There's a trick to measuring flour. It's called the pack and level method. Inside the bag, you want to pack the flour down hard into the measuring cup. I just put one hand in the bag with the cup, and use the other hand outside the bag, to pack down the flour into the measuring cup. I then slide the cup up against the edge of the bag to level it out. Here's what it should look like.

Remember, we're going to need 6 of these. Put the flour in a separate (clean and dry please!) bowl.

Next, we add the salt.

1 tablespoon, please.

We now want to mix these together. By "mix" I mean gently poke at this with a spoon. The salt mixes in before you know it, and we don't need a dust storm.

Mixing Things Up.
So now we gotta put the dry shit into the wet shit. But we don't want to do it all at once. If we did, we'd get the never ending land of lumpy dough. So we're going to add a bit at a time, while the dough mixes.
First, we use a mixer attachment to start off with.

Then we turn the mixer on, and start spooning the dry ingredients in, one spoonful at the time.

Caution: keep the mixer on it's lowest setting. Watch the mixer and your spoon. You don't want to get the spoon knocked out of your hand and have to go fishing for it.
When you first start spooning the flour in, the water will get milky. Then pretty soon it gets to a pancake batter consistency.

And then it thickens up faster and faster, which each spoonful. Don't add too much flour at a time. The thicker the dough gets, the longer it will take for the flour to incorporate. Wait for the flour to incorporate before adding more. Your patience will reward you.

We want to keep adding flour until we get to what I like to call the Spiderman Stage.

In the Spiderman Stage, the dough will stick to the mixer attachment, the side of the bowl, and as the mixer turns, it will form stretchy patterns. When this happens, it's time to turn the mixer off.
Let's Bring In The Dough Hook
This is a dough hook.

It attaches onto your mixer. More on why we need this later.
Now, turn the mixer on low, and keep adding flour. The flour will mix in slower with the dough hook, so be aware of that.

Now you may be looking at this, and thinking, this just doesn't look right. Don't worry, just keep adding flour, let it incorporate into the dough, and add some more.
You may even get a wet on the inside, dry on the outside kind of look with your dough.

Don't worry, just keep the mixer going, and keep adding flour.
You may notice the dough that's stuck to the bowl is creating a layering kind of effect. Don't worry about it. Just keep the mixer going, and keep adding flour.

At this point you might notice something a little strange. Most of the dough is on the dough hook, and not much of it is left in the bowl. This is exactly what we want.

You may find that the dough falls off the dough hook, and turns into a wet sticky pool at the bottom of the bowl. What's happened is that the last few doses of flour has finally soaked up water. Don't worry about it, just keep adding flour.
Cooking Tip#3: How much flour is ultimately needed for your dough will be higher or lower from day to day. How can that be? If the relative humidity in your kitchen is higher, then the flour that you keep in your cupboard will be wetter. When humidity is lower in your kitchen, then your flour will be drier.
If you use all 6 cups of the flour you've scooped out, and the dough is still a sticky mess at the bottom of the bowl, then spoon more flour in your dough, never stopping the mixer from your flour bag. Let each spoonful incorporate into the dough before adding more. We need that dough to stick to the dough hook, and not the bowl.

And before you know it, almost all the dough begins to stick to the dough hook.

If the dough again begins to pool at the bottom of the bowl, add more flour. If the dough stays on the dough hook, what the hell, add some more flour anyway. If almost all the dough is on the dough hook, but there's floury bits of dough at the bottom of the bowl, stop adding flour. Just keep the mixer going until it incorporates. If it doesn't incorporate, don't worry, we can fix that.
If all goes right, then you'll soon see that the bowl is nearly free of dough, and almost everything is on the dough hook.

Let's Lube The Dough.
At this point, it's time to bring in the olive oil.

This will do a few things. 1) it will add flavor to our dough, 2) it will make our dough more slick and less sticky, and 3) it will bring in more moisture.
Because olive oil will add more moisture, it will make the dough wetter, which means that we really don't want to add too much, because our dough will fall off the dough hook, and turn into a sticky mess on the bottom of the bowl again. We only want to add just a little bit. How much? I don't know. I eyeball it. It's about a tablespoon. The goal here is to lube the mixing bowl and the dough. We don't need any more than that.
With the mixer going, and the dough firmly on the dough hook now, slowly pour in the olive oil.

And before we know it, our bowl is almost completely free of any dough that's stuck to it.

Let's Beat The Crap Out of the Dough.
So now that all the ingredients are in, our dough is done. Well, not exactly. We need to develop the dough. Right now our dough is ready, but if we tried to bake it, it would tear easily. So what we have to do is beat the crap out of it. Yes, really. What happens when you beat the crap out of it, is that you develop gluten in the dough. This will act as a glue to make the dough stretchable. It will also have a more delicate flavor and texture after it's cooked.
So how do we beat the crap out of our dough? Just keep your mixer going. Put it on a higher setting (I bump it up to 2 instead of Low on my Kitchenaide). If the dough looks a little wet, or not quite as stiff as you want it, sprinkle a bit more flour into the bowl. And I do mean sprinkle. At this point a little bit will do ya.
How long do we beat the crap out of our dough? Set a timer for 15 minutes, and just let the mixer run. Keep an eye on the mixer, in case it's doing a little dance on your counter. We don't want everything to fall onto the floor.
When the dough is developed, it should be stretchy like hot mozzarella. If the dough stretches a bit, but then breaks, beat the crap out of your dough some more. If it stretches really good, then turn your mixer off.

Letting the Dough Rise.
So now we've got to let the yeast do their job and let the dough rise. This also means handling a very sticky clump of dough. So how do we handle the dough without it handling us? We use anti-stick protection!
We have 2 tools for this. 1) Flour and 2) olive oil.
First we need to transfer the dough to a separate bowl to let it rise. We don't want the dough to stick to the bowl, so we pour some olive oil in it, and then lube the bowl up with our fingers. You remembered to wash your hands, right?

Now wash your hands again. We want our hands free of oil. Then we get some flour on our hands, and we rub our hands around so that every part of our hands are covered in a layer of flour.

We then detach the dough hook, and slide the hook off the dough. When that's done, we toss a little extra anti-stick flour protection on our dough.

Spread the flour around our dough, to give the dough a layer of anti-stick protection, and yank dough out of the bowl and into our hands.
We now need to work the dough in our hands a bit. We're going to need to make a ball.
To do this we grab the side of the dough.

And then we tuck it into the bottom.

Spin the dough around, and tuck in the other side, until it's a ball shape. It doesn't have to be perfect, just a rough round shape. The point here is to have a fairly smooth "skin" facing up in the bowl while it rises.
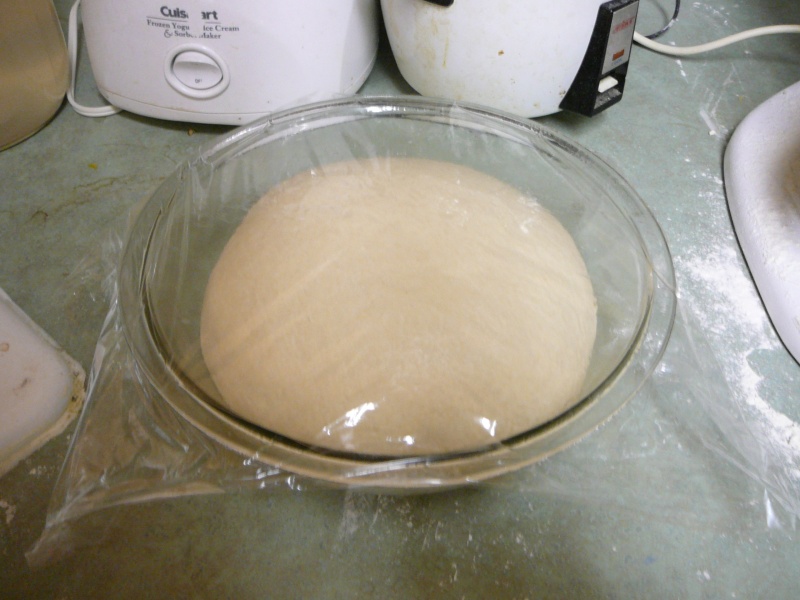
We then put the dough in our lubed rising bowl, skin side down, and then flip the dough over in the bowl, so the entire outside of the dough is lubed with olive oil. This helps prevent the surface of the dough from drying out.

We then cover our dough with cling wrap. You can also use a clean tea towel. We don't want to wrap the cling wrap tightly, we just want to cover the bowl. After all, we don't want something to land in our dough while it rises, but we don't want to wrap it up tight, so that the CO2 that the yeast are exhaling can't escape.

How long do we let the dough rise? Well, that depends on the yeast. But I find I can get away with letting it rise for 45 minutes, but really, the final results will be better if you let it rise for an hour. Hey, I said it was going to be good. I didn't say it was fast.
Letting the Dough Rise, Part II
Now, it's punch down time. As the yeast have done their thing, the dough has poofed up, big time.

Inside the dough, very large CO2 bubbles have developed. Now this would be all fine and good if you wanted to bake a rustic kind of bread, but I'm not a big fan of my pizza dough looking like Swiss cheese. So, we've got to get rid of the big bubbles. Which means, we gotta give our dough a punch. Or, in this case, a shove.

We now cover our hands again in a bit of flour, reforming the dough into a ball again. If we wanted to bake bread, at this point instead of putting the dough back in the bowl, we could put it in a bread pan, and let the dough rise some more. Since we're doing pizza, the dough goes back into the bowl to do a 2nd rising.

Oh, and don't forget to cover the dough again.

We let the dough rise for another 45 minutes, which gives us enough time to start working on the sauce.
Step 2: Making the Sauce.
Pizza sauce and pasta sauce is not the same. It's similar, but it ain't the same. Pizza sauce, when done right, is thicker, spicier, and richer. After all, you're not using a ton of it. Make it count. You can modify this sauce to your liking, depending on your tastes.
Starting with the Aromatics.
In cooking, there are a class of things called aromatics. These are typically veggie ingredients who's primary purpose in cooking is to add a ton of flavor.
The holy trinity of aromatics are 1) onion 2) celery 3) carrots.
But there are others. Herbs like parsley, basil, rosemary, and dill. It includes shallots, garlic, bell peppers, and others. Most aromatics are hard veggies in their raw state, and because of this, need to be cooked first to soften them up.
In this recipe, we're going to use 4 cloves of garlic (you can use 2 if you like). Normally, I use 1 large onion, but I only had medium sized onions on hand, so I used 2. I'm also using fresh parsley from my garden.
Cooking tip #4: You can use dried herbs. However, whenever possible I always prefer to use fresh. Why? It tastes a zillion times better. Since it's winter, I only have fresh parsley, but normally I use fresh oregano and fresh basil from my garden.

Now normally, if I was making a salsa I might chop up the garlic and onions with a knife. But for a sauce, I can never get the onion fine enough. So I've opted to just make things easier, and use a food processor.
But first, we've got to get the skin off the garlic. To do this, we beat the crap out of the garlic. Some people use a wooden hammer to do this, me, I just use the flat bottom of a clean glass. One or two good whacks should do it.

Now that the garlic is mushed, it's easy as pie to take their skins off.

But they still have a very hard tip on their stem end. And I really don't want to eat that. So we cut off the hard stem end.

And they look like this.

So in the food processor, the garlics go.

And they get a few pulses to break them up.

Next we chop the ends off the onions.

And then we cut the onion in half.

This gives us a nice little lip, so we can peel the skin off the onion.

Into the food processor they go, and they get a coarse chop.

But we're gonna want a finer chop than this. So using the unsharp side of a butter knife, I run it around in the food processor, knocking everything to the bottom. A few more pulses, until our garlic and onions are finely diced.

Sweating the Aromatics
Now it's time to start cooking. Preheat a 12 inch cast iron on medium low heat. Speaking of preheating, let's preheat the oven too. Set it to 375 degrees.
Allow the cast iron to heat up for 3-5 minutes before you put anything in it. Once, it's warmed up, add a little bit of olive oil.

Add a pat of butter too. If the butter sizzles, then wait for it to melt.

Scoop the contents from the food processor and add it to our cast iron.

And add a pinch of salt.
Why a pinch of salt? Because we're sweating the onions here. You know how when you've eaten something salty and you get thirsty? Well, adding salt will make our onions thirsty. So they will "drink" some of the oil and butter, and this will stop them from quickly burning.
When the onions become translucent in color, they're done.

Cooking & Seasoning the Sauce.
Now that we've sweated our onion and garlic, it's time to add the sauce. Add 1 can of Hunt's tomato sauce.
Note: You can use the sauce recipe to make a great pasta sauce. Just use 1 clove of garlic instead of 4, and use 2 cans of tomato sauce instead of 1.

In it goes.

Stir it around. You may need to reduce the heat down to low or simmer.

Cooking Tip#5: Take 1/4 teaspoon of salt, cup your palm, and put the salt in your hand. Take note of about how much salt that is. Now, do the same experiment with a 1/2 teaspoon of salt. Now when you're cooking and you get in a hurry, you can ballpark how much a 1/4 and 1/2 teaspoon is just by pouring some in your hand.
Now, it's time to season. Before we start, taste a bit of the sauce. How does it taste? Flat? Add some salt. Tart and acidic? Add some sugar. Normally, I add 1/4 teaspoon of salt.

a 1/4 teaspoon of freshly ground black pepper.

1/4 teaspoon of crushed red pepper (feel free to skip this, if spicy isn't your thing)

And 1/2 teaspoon of sugar.

Now I use the food processor to chop up the fresh herbs.

And add it all to the sauce, stirring well.

Normally, I like to use nothing but fresh herbs from my garden, but it's winter time, so instead I opt for about 1/4 teaspoon of Italian seasoning.

And 1/4 teaspoon of dried basil. I so wish I had fresh basil right now.

Stir in to combine.

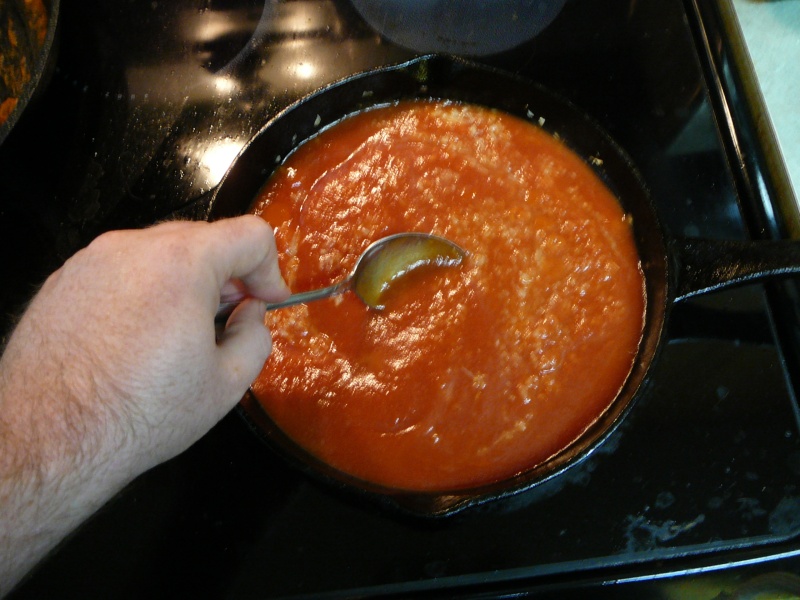
Continue stirring the sauce until it begins to thicken. What's happening is that water is evaporating from the sauce, resulting in a thicker sauce. Stir the sauce frequently. When it starts to get done, it will become a brick red color, and it will be less runny.

Here's a trick I use to test if the sauce is done. If I can pull the sauce away from the edge with a spoon, and the sauce holds that circle shape, then it's done.

Turn off the heat, but leave the sauce on the burner. It will continue to thicken a bit more, while we begin to prepare our dough.
Step 3: Putting It All Together.
Now we're in the home stretch. All that's left is to put everything together.
Rolling Out the Dough.
Now that the sauce is ready, the dough has finished it's 2nd rising. Which means it's time to roll it out.

Dust your pizza pans with flour, and give the dough and your hands a dusting too. I like to shape the dough into a loaf shape. This will be used to make two pizzas, one round and one rectangle pizza cooked in a cookie sheet. I tear off about a third of the dough to reserve it for the round pizza.

I then mash the dough down with my hands. The point here is to get the dough in roughly a rectangle shape.

While experienced cooks can shape a pizza by spinning it in the air, I'd rather not have dough stick to my ceiling, fall on the floor, or land on my head. Plus, this wouldn't work well on a rectangle pizza. So I use a different method. I pick the dough up at one end, and give it a little shake. Gravity works in my favor, and stretches the dough out.

I then turn the dough around, and repeat, stretching the dough out in the other direction.

By now, we're getting close to the shape we need. So now it's time to roll things out. You don't need a rolling pin for this. All you really need is something round. I just use a glass. It works like a charm.
When rolling out dough, always roll in one direction. Start close to you.

And roll away from you.

This prevents the dough from falling off the counter and onto the floor.
You may discover that at first this takes a bit of elbow grease. That's to be expected, but don't try to get your final shape all in one go. Roll the dough out, getting the shape closer to what you want, flip the dough over, and roll again. This prevents the dough from sticking to the pan. If it sticks it could burn, and it'll be difficult to dish up once it's cooked.
Once you get the dough close to it's final shape, flip it over one more time, and very gently roll it out to trim up the shape. The glass I use has a narrow base, which is perfect for creating higher crusts for the pizza dough.

The process is much the same with a traditional round pizza. I grab the dough at one end, give it a little shake to stretch it out, and then move the dough around in my hands so it slowly stretches out in every direction.

I then roll the dough out to rough up the shape.

When doing this start by rolling close to you.
 And finishing away from you. Then spin the entire pan, to roll out in another direction.

Remember to flip the dough, to prevent sticking, and once the final shape is done, roll around the edges to create a crust.

Assembling the Pizza.
We're almost done. Now all we have to do is assemble the pizza. It should be noted that here is where a lot of people screw things up. They add too much sauce to the dough. As a result, once it's cooked, the cheese and the toppings slide right off the pizza, and if you're really lucky, it doesn't land in your lap.
So here is what we do to avoid this. With a large spoon pour a single spoonful of sauce onto the dough.

Then using the back of the spoon, spread the sauce out.

Keep spreading the sauce out over the entire dough before getting another spoonful. When you're done, it should be no more sauce than this:

The same for the round pizza.

I like to add a bit of grated Parmesan.

Just a light dusting.


And now it's time for the toppings. First a put just a little bit of shredded mozzarella.


And then I add my toppings. In this case, mushroom and red peppers.


And then I top off with mozzarella.


Into the oven they go at 375 degrees for 10 minutes. I place one pizza the top rack and one on the bottom rack. After 10 minutes, I rotate the pizzas, and put the bottom rack pizza on the top rack, and the top rack pizza to the bottom rack. They bake for 10 more minutes.
And then they're done. I let them cool for 3-5 minutes before cutting them up and serving.


Enjoy!
This guide is long, but it's meant to make this mistake-proof for people who don't have a lot of cooking experience.
Step 1: The Pizza Dough.
The recipe was adopted from here: http://allrecipes.com/recipe/pizza-dough-iii/ However, I've modified it a bit. The ingredients call for:
1 (.25 ounce) package active dry yeast
1 cup warm water (110 degrees F/45 degrees C)
2 cups bread flour
2 tablespoons olive oil
1 teaspoon salt
2 teaspoons white sugar
However, I discovered that this makes for not a lot of dough for a pizza, and it's hard to roll out. This would be fine for a simple white bread recipe, but if I'm going to bake, I like to have left overs. So, I'm going to triple this recipe. I'm also going to rearrange this list, to add the ingredients in order. So it becomes:
3 cups warm water (use hot tap water)
6 teaspoons white sugar
1 package active dry yeast
6 cups all purpose flour, plus extra as needed
3 teaspoons salt
olive oil as needed, about 1 tablespoon.
Cooking Tip #1. 3 teaspoons = 1 tablespoon. Therefore our sugar becomes 2 tablespoons, and our salt becomes 1 tablespoon.
So now we have the ingredient list, now let's begin.
Hot Water.
Cooking Tip #2. There is a difference between wet and dry measuring cups. One thing can't be used for the other. We begin with 3 cups hot tap water using a wet measuring cup.

Now we add 2 tablespoons of white sugar.

Now we stir this around with a spoon.

We want to dissolve all the sugar into the water, so we no longer see any sugar granules left.

Yeast
Transfer hot water to a mixing bowl.

Now it's time for the yeast.

Do NOT just dump the yeast in the water. Instead we want to sprinkle the yeast on top of the water, avoiding making little yeast clumps.

When we finish adding the entire package, it should look like this.

Now we wait about 5 minutes for our yeasties to get foamy. When they do, they will look like this.

Next, it's time to do a smell test. Does the bowl smell like fresh bread? It should.
Yeast trivia: Yeast is a kind of tiny fungus. They live very short lives. In the time it took for our yeast to get foamy, they have reproduced a few million times.
Yeast do a few different biological things. 1) Like us, they breathe in oxygen, and breathe out carbon dioxide (CO2). 2) They eat sugar. 3) They also poop. Except their poop is ethanol. In other words, their poop makes humans drunk. Yeast is used to make alcoholic beverages, we use the poop, and discard the CO2. In bread, the alcohol is cooked off and evaporates, but what they breathe out (CO2) is used to let dough rise. Without this, bread would be more like crackers than bread.
Measuring The Dry Ingredients
While we wait for our yeast to get foamy, let's measure out the dry ingredients. Now since it's dry, we need to use a dry measuring cup.

We will be using all purpose flour.

There's a trick to measuring flour. It's called the pack and level method. Inside the bag, you want to pack the flour down hard into the measuring cup. I just put one hand in the bag with the cup, and use the other hand outside the bag, to pack down the flour into the measuring cup. I then slide the cup up against the edge of the bag to level it out. Here's what it should look like.

Remember, we're going to need 6 of these. Put the flour in a separate (clean and dry please!) bowl.

Next, we add the salt.

1 tablespoon, please.

We now want to mix these together. By "mix" I mean gently poke at this with a spoon. The salt mixes in before you know it, and we don't need a dust storm.

Mixing Things Up.
So now we gotta put the dry shit into the wet shit. But we don't want to do it all at once. If we did, we'd get the never ending land of lumpy dough. So we're going to add a bit at a time, while the dough mixes.
First, we use a mixer attachment to start off with.

Then we turn the mixer on, and start spooning the dry ingredients in, one spoonful at the time.

Caution: keep the mixer on it's lowest setting. Watch the mixer and your spoon. You don't want to get the spoon knocked out of your hand and have to go fishing for it.
When you first start spooning the flour in, the water will get milky. Then pretty soon it gets to a pancake batter consistency.

And then it thickens up faster and faster, which each spoonful. Don't add too much flour at a time. The thicker the dough gets, the longer it will take for the flour to incorporate. Wait for the flour to incorporate before adding more. Your patience will reward you.

We want to keep adding flour until we get to what I like to call the Spiderman Stage.

In the Spiderman Stage, the dough will stick to the mixer attachment, the side of the bowl, and as the mixer turns, it will form stretchy patterns. When this happens, it's time to turn the mixer off.
Let's Bring In The Dough Hook
This is a dough hook.

It attaches onto your mixer. More on why we need this later.
Now, turn the mixer on low, and keep adding flour. The flour will mix in slower with the dough hook, so be aware of that.

Now you may be looking at this, and thinking, this just doesn't look right. Don't worry, just keep adding flour, let it incorporate into the dough, and add some more.
You may even get a wet on the inside, dry on the outside kind of look with your dough.

Don't worry, just keep the mixer going, and keep adding flour.
You may notice the dough that's stuck to the bowl is creating a layering kind of effect. Don't worry about it. Just keep the mixer going, and keep adding flour.

At this point you might notice something a little strange. Most of the dough is on the dough hook, and not much of it is left in the bowl. This is exactly what we want.

You may find that the dough falls off the dough hook, and turns into a wet sticky pool at the bottom of the bowl. What's happened is that the last few doses of flour has finally soaked up water. Don't worry about it, just keep adding flour.
Cooking Tip#3: How much flour is ultimately needed for your dough will be higher or lower from day to day. How can that be? If the relative humidity in your kitchen is higher, then the flour that you keep in your cupboard will be wetter. When humidity is lower in your kitchen, then your flour will be drier.
If you use all 6 cups of the flour you've scooped out, and the dough is still a sticky mess at the bottom of the bowl, then spoon more flour in your dough, never stopping the mixer from your flour bag. Let each spoonful incorporate into the dough before adding more. We need that dough to stick to the dough hook, and not the bowl.

And before you know it, almost all the dough begins to stick to the dough hook.

If the dough again begins to pool at the bottom of the bowl, add more flour. If the dough stays on the dough hook, what the hell, add some more flour anyway. If almost all the dough is on the dough hook, but there's floury bits of dough at the bottom of the bowl, stop adding flour. Just keep the mixer going until it incorporates. If it doesn't incorporate, don't worry, we can fix that.
If all goes right, then you'll soon see that the bowl is nearly free of dough, and almost everything is on the dough hook.

Let's Lube The Dough.
At this point, it's time to bring in the olive oil.

This will do a few things. 1) it will add flavor to our dough, 2) it will make our dough more slick and less sticky, and 3) it will bring in more moisture.
Because olive oil will add more moisture, it will make the dough wetter, which means that we really don't want to add too much, because our dough will fall off the dough hook, and turn into a sticky mess on the bottom of the bowl again. We only want to add just a little bit. How much? I don't know. I eyeball it. It's about a tablespoon. The goal here is to lube the mixing bowl and the dough. We don't need any more than that.
With the mixer going, and the dough firmly on the dough hook now, slowly pour in the olive oil.

And before we know it, our bowl is almost completely free of any dough that's stuck to it.

Let's Beat The Crap Out of the Dough.
So now that all the ingredients are in, our dough is done. Well, not exactly. We need to develop the dough. Right now our dough is ready, but if we tried to bake it, it would tear easily. So what we have to do is beat the crap out of it. Yes, really. What happens when you beat the crap out of it, is that you develop gluten in the dough. This will act as a glue to make the dough stretchable. It will also have a more delicate flavor and texture after it's cooked.
So how do we beat the crap out of our dough? Just keep your mixer going. Put it on a higher setting (I bump it up to 2 instead of Low on my Kitchenaide). If the dough looks a little wet, or not quite as stiff as you want it, sprinkle a bit more flour into the bowl. And I do mean sprinkle. At this point a little bit will do ya.
How long do we beat the crap out of our dough? Set a timer for 15 minutes, and just let the mixer run. Keep an eye on the mixer, in case it's doing a little dance on your counter. We don't want everything to fall onto the floor.
When the dough is developed, it should be stretchy like hot mozzarella. If the dough stretches a bit, but then breaks, beat the crap out of your dough some more. If it stretches really good, then turn your mixer off.

Letting the Dough Rise.
So now we've got to let the yeast do their job and let the dough rise. This also means handling a very sticky clump of dough. So how do we handle the dough without it handling us? We use anti-stick protection!
We have 2 tools for this. 1) Flour and 2) olive oil.
First we need to transfer the dough to a separate bowl to let it rise. We don't want the dough to stick to the bowl, so we pour some olive oil in it, and then lube the bowl up with our fingers. You remembered to wash your hands, right?

Now wash your hands again. We want our hands free of oil. Then we get some flour on our hands, and we rub our hands around so that every part of our hands are covered in a layer of flour.

We then detach the dough hook, and slide the hook off the dough. When that's done, we toss a little extra anti-stick flour protection on our dough.

Spread the flour around our dough, to give the dough a layer of anti-stick protection, and yank dough out of the bowl and into our hands.
We now need to work the dough in our hands a bit. We're going to need to make a ball.
To do this we grab the side of the dough.

And then we tuck it into the bottom.

Spin the dough around, and tuck in the other side, until it's a ball shape. It doesn't have to be perfect, just a rough round shape. The point here is to have a fairly smooth "skin" facing up in the bowl while it rises.
We then put the dough in our lubed rising bowl, skin side down, and then flip the dough over in the bowl, so the entire outside of the dough is lubed with olive oil. This helps prevent the surface of the dough from drying out.

We then cover our dough with cling wrap. You can also use a clean tea towel. We don't want to wrap the cling wrap tightly, we just want to cover the bowl. After all, we don't want something to land in our dough while it rises, but we don't want to wrap it up tight, so that the CO2 that the yeast are exhaling can't escape.

How long do we let the dough rise? Well, that depends on the yeast. But I find I can get away with letting it rise for 45 minutes, but really, the final results will be better if you let it rise for an hour. Hey, I said it was going to be good. I didn't say it was fast.
Letting the Dough Rise, Part II
Now, it's punch down time. As the yeast have done their thing, the dough has poofed up, big time.

Inside the dough, very large CO2 bubbles have developed. Now this would be all fine and good if you wanted to bake a rustic kind of bread, but I'm not a big fan of my pizza dough looking like Swiss cheese. So, we've got to get rid of the big bubbles. Which means, we gotta give our dough a punch. Or, in this case, a shove.

We now cover our hands again in a bit of flour, reforming the dough into a ball again. If we wanted to bake bread, at this point instead of putting the dough back in the bowl, we could put it in a bread pan, and let the dough rise some more. Since we're doing pizza, the dough goes back into the bowl to do a 2nd rising.

Oh, and don't forget to cover the dough again.
We let the dough rise for another 45 minutes, which gives us enough time to start working on the sauce.
Step 2: Making the Sauce.
Pizza sauce and pasta sauce is not the same. It's similar, but it ain't the same. Pizza sauce, when done right, is thicker, spicier, and richer. After all, you're not using a ton of it. Make it count. You can modify this sauce to your liking, depending on your tastes.
Starting with the Aromatics.
In cooking, there are a class of things called aromatics. These are typically veggie ingredients who's primary purpose in cooking is to add a ton of flavor.
The holy trinity of aromatics are 1) onion 2) celery 3) carrots.
But there are others. Herbs like parsley, basil, rosemary, and dill. It includes shallots, garlic, bell peppers, and others. Most aromatics are hard veggies in their raw state, and because of this, need to be cooked first to soften them up.
In this recipe, we're going to use 4 cloves of garlic (you can use 2 if you like). Normally, I use 1 large onion, but I only had medium sized onions on hand, so I used 2. I'm also using fresh parsley from my garden.
Cooking tip #4: You can use dried herbs. However, whenever possible I always prefer to use fresh. Why? It tastes a zillion times better. Since it's winter, I only have fresh parsley, but normally I use fresh oregano and fresh basil from my garden.

Now normally, if I was making a salsa I might chop up the garlic and onions with a knife. But for a sauce, I can never get the onion fine enough. So I've opted to just make things easier, and use a food processor.
But first, we've got to get the skin off the garlic. To do this, we beat the crap out of the garlic. Some people use a wooden hammer to do this, me, I just use the flat bottom of a clean glass. One or two good whacks should do it.

Now that the garlic is mushed, it's easy as pie to take their skins off.

But they still have a very hard tip on their stem end. And I really don't want to eat that. So we cut off the hard stem end.

And they look like this.

So in the food processor, the garlics go.

And they get a few pulses to break them up.

Next we chop the ends off the onions.

And then we cut the onion in half.

This gives us a nice little lip, so we can peel the skin off the onion.

Into the food processor they go, and they get a coarse chop.

But we're gonna want a finer chop than this. So using the unsharp side of a butter knife, I run it around in the food processor, knocking everything to the bottom. A few more pulses, until our garlic and onions are finely diced.

Sweating the Aromatics
Now it's time to start cooking. Preheat a 12 inch cast iron on medium low heat. Speaking of preheating, let's preheat the oven too. Set it to 375 degrees.
Allow the cast iron to heat up for 3-5 minutes before you put anything in it. Once, it's warmed up, add a little bit of olive oil.

Add a pat of butter too. If the butter sizzles, then wait for it to melt.

Scoop the contents from the food processor and add it to our cast iron.

And add a pinch of salt.
Why a pinch of salt? Because we're sweating the onions here. You know how when you've eaten something salty and you get thirsty? Well, adding salt will make our onions thirsty. So they will "drink" some of the oil and butter, and this will stop them from quickly burning.
When the onions become translucent in color, they're done.

Cooking & Seasoning the Sauce.
Now that we've sweated our onion and garlic, it's time to add the sauce. Add 1 can of Hunt's tomato sauce.
Note: You can use the sauce recipe to make a great pasta sauce. Just use 1 clove of garlic instead of 4, and use 2 cans of tomato sauce instead of 1.

In it goes.

Stir it around. You may need to reduce the heat down to low or simmer.
Cooking Tip#5: Take 1/4 teaspoon of salt, cup your palm, and put the salt in your hand. Take note of about how much salt that is. Now, do the same experiment with a 1/2 teaspoon of salt. Now when you're cooking and you get in a hurry, you can ballpark how much a 1/4 and 1/2 teaspoon is just by pouring some in your hand.
Now, it's time to season. Before we start, taste a bit of the sauce. How does it taste? Flat? Add some salt. Tart and acidic? Add some sugar. Normally, I add 1/4 teaspoon of salt.

a 1/4 teaspoon of freshly ground black pepper.

1/4 teaspoon of crushed red pepper (feel free to skip this, if spicy isn't your thing)

And 1/2 teaspoon of sugar.

Now I use the food processor to chop up the fresh herbs.

And add it all to the sauce, stirring well.

Normally, I like to use nothing but fresh herbs from my garden, but it's winter time, so instead I opt for about 1/4 teaspoon of Italian seasoning.

And 1/4 teaspoon of dried basil. I so wish I had fresh basil right now.

Stir in to combine.

Continue stirring the sauce until it begins to thicken. What's happening is that water is evaporating from the sauce, resulting in a thicker sauce. Stir the sauce frequently. When it starts to get done, it will become a brick red color, and it will be less runny.

Here's a trick I use to test if the sauce is done. If I can pull the sauce away from the edge with a spoon, and the sauce holds that circle shape, then it's done.

Turn off the heat, but leave the sauce on the burner. It will continue to thicken a bit more, while we begin to prepare our dough.
Step 3: Putting It All Together.
Now we're in the home stretch. All that's left is to put everything together.
Rolling Out the Dough.
Now that the sauce is ready, the dough has finished it's 2nd rising. Which means it's time to roll it out.

Dust your pizza pans with flour, and give the dough and your hands a dusting too. I like to shape the dough into a loaf shape. This will be used to make two pizzas, one round and one rectangle pizza cooked in a cookie sheet. I tear off about a third of the dough to reserve it for the round pizza.

I then mash the dough down with my hands. The point here is to get the dough in roughly a rectangle shape.

While experienced cooks can shape a pizza by spinning it in the air, I'd rather not have dough stick to my ceiling, fall on the floor, or land on my head. Plus, this wouldn't work well on a rectangle pizza. So I use a different method. I pick the dough up at one end, and give it a little shake. Gravity works in my favor, and stretches the dough out.

I then turn the dough around, and repeat, stretching the dough out in the other direction.

By now, we're getting close to the shape we need. So now it's time to roll things out. You don't need a rolling pin for this. All you really need is something round. I just use a glass. It works like a charm.
When rolling out dough, always roll in one direction. Start close to you.

And roll away from you.

This prevents the dough from falling off the counter and onto the floor.
You may discover that at first this takes a bit of elbow grease. That's to be expected, but don't try to get your final shape all in one go. Roll the dough out, getting the shape closer to what you want, flip the dough over, and roll again. This prevents the dough from sticking to the pan. If it sticks it could burn, and it'll be difficult to dish up once it's cooked.
Once you get the dough close to it's final shape, flip it over one more time, and very gently roll it out to trim up the shape. The glass I use has a narrow base, which is perfect for creating higher crusts for the pizza dough.

The process is much the same with a traditional round pizza. I grab the dough at one end, give it a little shake to stretch it out, and then move the dough around in my hands so it slowly stretches out in every direction.

I then roll the dough out to rough up the shape.

When doing this start by rolling close to you.
 And finishing away from you. Then spin the entire pan, to roll out in another direction.
Remember to flip the dough, to prevent sticking, and once the final shape is done, roll around the edges to create a crust.

Assembling the Pizza.
We're almost done. Now all we have to do is assemble the pizza. It should be noted that here is where a lot of people screw things up. They add too much sauce to the dough. As a result, once it's cooked, the cheese and the toppings slide right off the pizza, and if you're really lucky, it doesn't land in your lap.
So here is what we do to avoid this. With a large spoon pour a single spoonful of sauce onto the dough.

Then using the back of the spoon, spread the sauce out.

Keep spreading the sauce out over the entire dough before getting another spoonful. When you're done, it should be no more sauce than this:

The same for the round pizza.

I like to add a bit of grated Parmesan.

Just a light dusting.


And now it's time for the toppings. First a put just a little bit of shredded mozzarella.


And then I add my toppings. In this case, mushroom and red peppers.


And then I top off with mozzarella.


Into the oven they go at 375 degrees for 10 minutes. I place one pizza the top rack and one on the bottom rack. After 10 minutes, I rotate the pizzas, and put the bottom rack pizza on the top rack, and the top rack pizza to the bottom rack. They bake for 10 more minutes.
And then they're done. I let them cool for 3-5 minutes before cutting them up and serving.


Enjoy!